Installing the 35-ds3chipdus3 can be a crucial step for users looking to enhance their device’s performance or add specific functionalities. Whether you are a tech enthusiast or a first-time installer, understanding the detailed process of how to install 35-ds3chipdus3 will save you time and frustration. This article provides a thorough, step-by-step guide designed to help you install the 35-ds3chipdus3 smoothly, safely, and correctly.
Understanding What 35-ds3chipdus3 Is
Before diving into the installation process, it’s important to understand what the 35-ds3chipdus3 actually is. The 35-ds3chipdus3 refers to a specialized hardware module or chip that often serves a particular function in devices such as computers, gaming consoles, or embedded systems. It might be designed to enhance processing power, improve connectivity, or add new features.
Knowing the purpose of the 35-ds3chipdus3 helps set realistic expectations for its installation and use. It also informs you about compatibility requirements and potential issues you might face.
Preparing for Installation
Proper preparation is key to a successful installation of the 35-ds3chipdus3. Rushing into the process without the right tools or environment can lead to errors or even damage.
Gather Necessary Tools and Materials
-
The 35-ds3chipdus3 device or chip itself.
-
A compatible device or system where the chip will be installed.
-
Tools such as screwdrivers (usually Phillips or flathead), anti-static wrist strap to prevent electrostatic discharge, and possibly tweezers for handling small components.
-
The user manual or installation guide specific to the 35-ds3chipdus3.
-
Driver software or firmware files, either on a CD, USB, or available for download from the manufacturer’s website.
-
A clean, static-free workspace.
Backup Important Data
Before installation, back up all important data from your device. While hardware installations generally do not affect stored data, accidents can happen, and a backup ensures you don’t lose anything valuable.
Power Down and Disconnect
Make sure your device is completely powered off and unplugged from any electrical outlet. Disconnect all peripherals such as USB devices, external drives, and network cables. This prevents electrical shock and protects your hardware during installation.
Step-by-Step Installation Process
Step 1: Open Your Device
Depending on the device type, you may need to open the case or access panel. Use the correct screwdriver to carefully remove screws and gently lift the panel. Keep the screws in a safe place to avoid losing them.
If your device is a laptop or a small system, be especially careful with delicate components and plastic clips.
Step 2: Locate the Appropriate Slot or Port
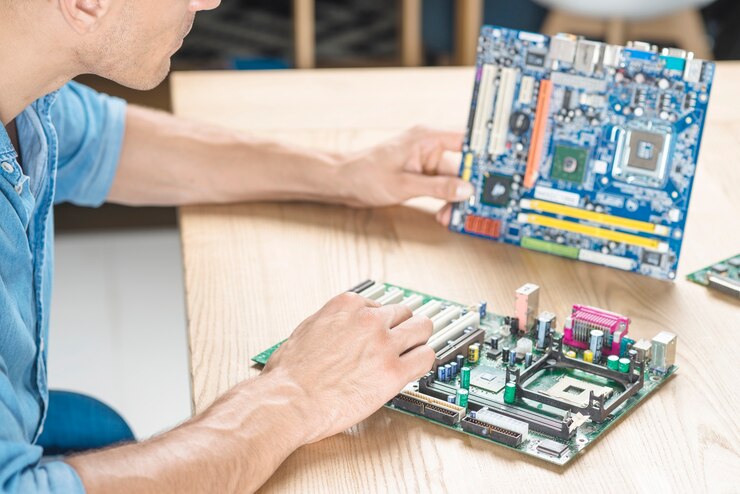
The 35-ds3chipdus3 must be installed in a specific slot or port. This could be an internal chip socket on a motherboard, a PCIe slot, or an external port depending on the device. Consult your device’s manual or the 35-ds3chipdus3 installation guide to find the exact location.
Look for labels or markings like “Chip Slot,” “Expansion Slot,” or “Module Port.”
Step 3: Handle the 35-ds3chipdus3 with Care
Before handling the chip, put on your anti-static wrist strap to prevent damaging the chip with static electricity. Hold the 35-ds3chipdus3 by its edges and avoid touching the gold contacts or circuitry.
Step 4: Insert the 35-ds3chipdus3 into the Slot
Align the chip carefully with the slot or port. It should slide in smoothly without excessive force. Make sure the chip is oriented correctly—look for a notch or keying mechanism that prevents incorrect installation.
Once aligned, press gently but firmly until the chip is fully seated in the slot.
Step 5: Secure the Chip
If your device requires it, secure the chip using screws or clips provided with the device or your system. This ensures it stays in place during operation.
Step 6: Close Your Device
Carefully reattach the panel or case cover and fasten the screws you removed earlier. Be sure everything is aligned properly to avoid damaging the case or internal components.
Step 7: Reconnect Power and Peripherals
Reconnect all cables and peripherals that you disconnected before opening the device. Plug in the power cable and prepare to power on your system.
Installing Drivers and Software
For most hardware components like the 35-ds3chipdus3, installing the appropriate drivers is essential to ensure your system recognizes and properly communicates with the chip.
Step 1: Power On and Check Initial Detection
Turn on your device and watch for any startup messages. Your operating system may automatically detect the new hardware and attempt to install basic drivers.
Step 2: Install Official Drivers
Locate the installation media that came with the 35-ds3chipdus3 or download the latest drivers from the official manufacturer’s website. Run the installer and follow the on-screen prompts carefully.
If your system is offline, ensure you have the correct installation files beforehand.
Step 3: Restart Your Device
After installing drivers, it’s recommended to restart your device to finalize the changes. This step ensures the chip is fully integrated with your system.
Step 4: Verify Installation
Once restarted, check your system settings, device manager, or software utility to confirm the 35-ds3chipdus3 is recognized and functioning correctly. Many chips come with diagnostic tools to verify operation.
Troubleshooting Common Issues
Even with careful installation, issues can sometimes arise. Here are some common problems and their solutions:
Problem: Device Not Detected
-
Check that the 35-ds3chipdus3 is properly seated in its slot.
-
Reinstall or update the drivers.
-
Try the chip in a different slot or system if possible.
Problem: System Fails to Boot After Installation
-
Remove the 35-ds3chipdus3 and see if the system boots normally.
-
Ensure no pins or connectors are bent or damaged.
-
Verify compatibility of the chip with your device.
Problem: Performance or Functionality Issues
-
Confirm you have installed the latest driver version.
-
Use any manufacturer-provided diagnostic tools.
-
Check for firmware updates for the chip.
Tips for Successful Installation
-
Always ground yourself to avoid static damage.
-
Handle the chip gently and avoid touching sensitive parts.
-
Follow the manufacturer’s instructions closely.
-
Work in a well-lit, clean environment.
-
If unsure about any step, seek professional help.
Read also: The Rise of Rowdy Oxford Integris: Redefining Performance and Style
Conclusion
Knowing how to install 35-ds3chipdus3 is essential for users looking to upgrade or repair their devices. This detailed guide covers everything from preparation to troubleshooting, ensuring you can handle the installation confidently. Taking the time to carefully follow each step will help you avoid common pitfalls and get the best performance from your 35-ds3chipdus3.
With proper care and attention, the installation of the 35-ds3chipdus3 can be straightforward and rewarding, opening up new possibilities for your device’s functionality and efficiency.